
I always have high hopes for my DIY skills. Some things go well… others not so much. Usually my projects hinge on that ONE PIECE that I scour Home Depot for, confusing their employees and making them want to yell “THIS IS NOT A FUCKING ARTS AND CRAFTS STORE” at me.
For this project I did have one Home Depot employee tell me, “Good luck with that.”
I had very good luck, sir, no thanks to you.

I admit, the galvanized pipe pieces were a bit expensive (mine cost me $55). But, hey, it’s still cheaper than buying one. The entire project cost me about $65, not including the board which I had pre-treated for one of my less successful projects.
The great thing about this project is it’s easily customizable. You can make as many hooks as you need, on separate mounts or all on one, horizontal or vertical — even diagonal if that suits your fancy. Spray paint is always an option, and the world is your oyster when it comes to mounting boards. But here’s the gist of what you need to know:
Supplies (for one helmet hook + mount):
1 1/2″-wide, 10″-long galvanized steel nipple (hehe, nipple)
1 1/2″-wide, 5″-long galvanized steel nipple
1 1/2″-wide, 90 degree galvanized steel elbow
2 1/2″-wide floor flanges
Mounting board
Screws (that fit your flanges and aren’t too long for your board)
Heavy-duty picture frame hangers
Felt or foam
Scissors
Screwdriver/Drill
Hot glue gun
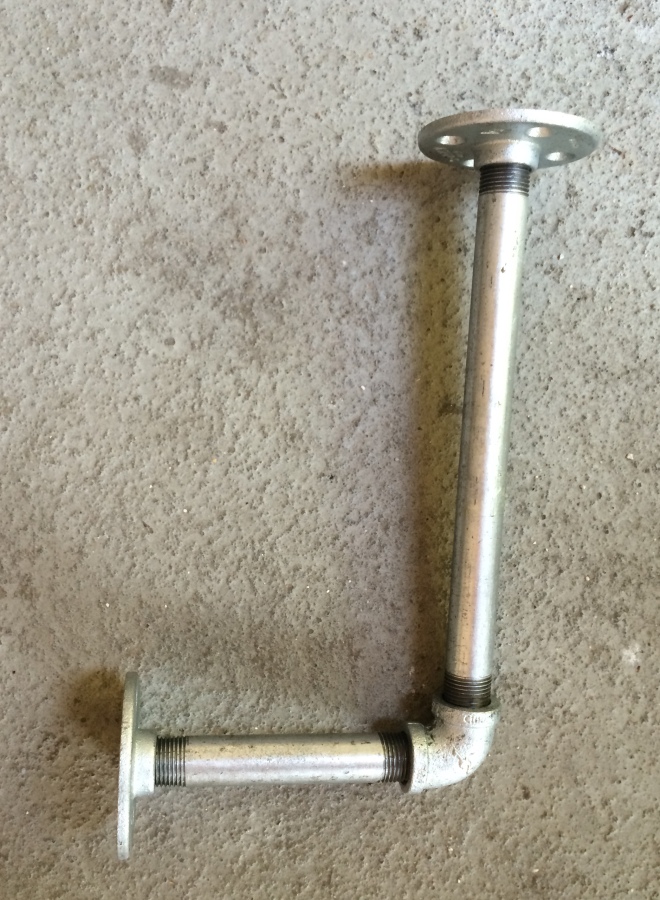
Here’s what I was working with:

First, you’re going to want to assemble one of the hooks, to see what you’re dealing with. If you’re doing the vertical thing like I did, you’re going to want to assemble them so you know where to mount them on the board. Here’s what that looks like:
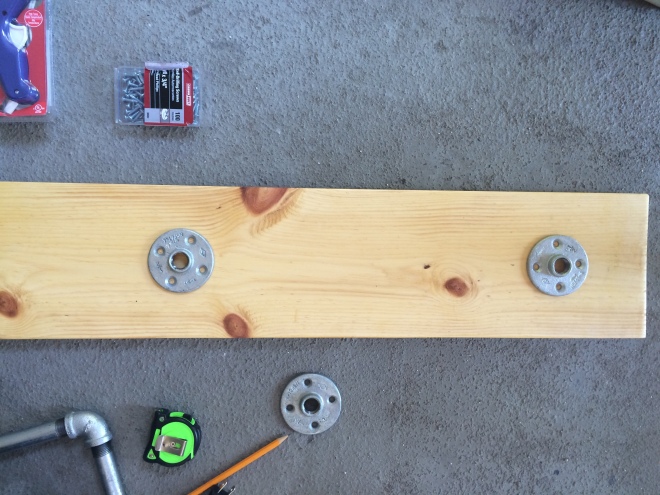
Next, you’ll need to figure out where on your boards you want to mount your pipes. I eyeballed where mine should go vertically, so we’d be able to get the bottom helmet on and off, then measured horizontally to make sure my flanges were centered. You’ll want to dissemble your pipes to do this.
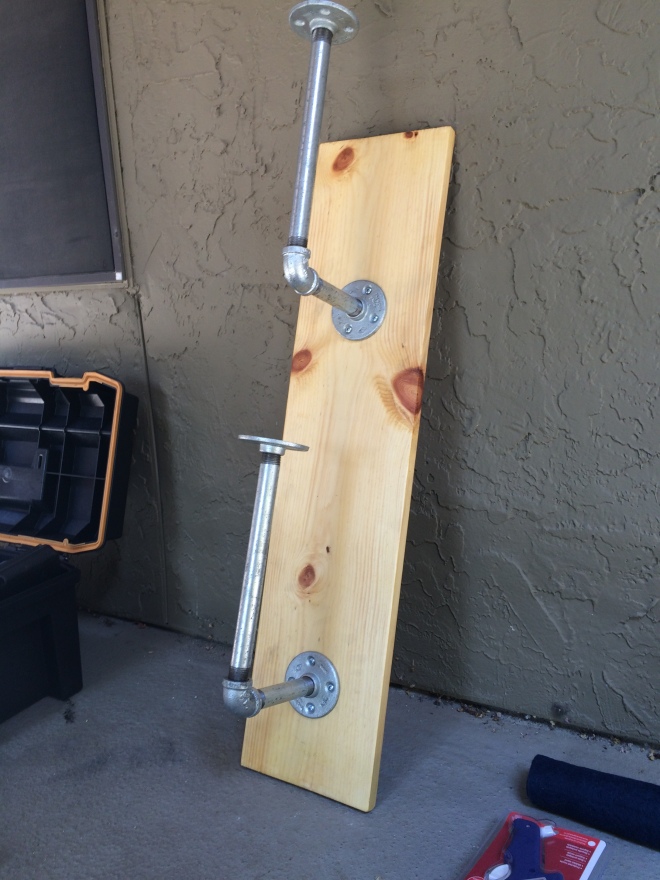
Once your flanges are tightened down, you can put the rest of the pipes on! Keep twisting until they’re pointing upright and aren’t about to go anywhere.
Told you this was easy! Now, take those top flanges and use them as a stencil to cut out a circle of felt or foam. Depending on the thickness of your felt or foam, you might want to cut multiple circles for each flange. I used thick wool felt and cut two circles each.
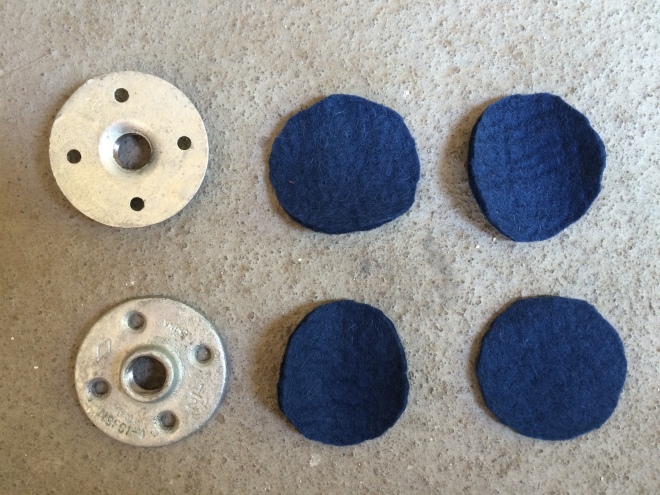
Now, the last steps! Take your hot glue gun and stick your felt circles onto the flanges, making sure to get around the edges. Then, turn the whole thing over and attach your heavy-duty picture hanger. Be sure to get it in the middle 😉
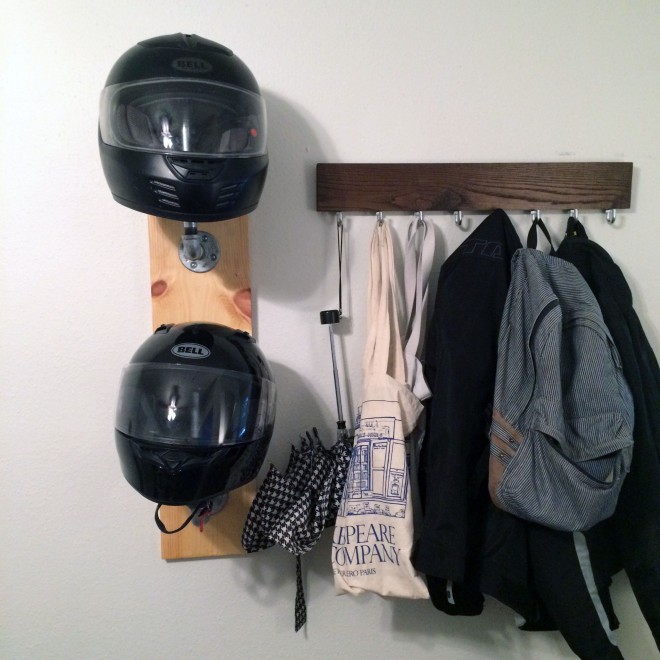
Then, hang it up and let your helmets enjoy their new home! Oh, I love a good easy DIY. If only I had better lighting in my apartment 😛
If you make a DIY helmet rack of your own, I’d love to see! Tag me on Instagram or use #ridewellblog.
And remember to always,
Ridewell
UP NEXT >>
Checking the weather every 15 minutes, being able to fit anything into a backpack, never needing a GPS… these are the things that make us motorcyclists.

Great idea! My helmets are in the over stuffed motorcycle clothes and junk closet and I would like to get my helmets out of there. Thanks from Tigerpaw2007 on Instagram.
Hey man, thanks for finding me on the blog! I can’t stress how easy this project is, you should do it 😀
hah, good stuff. myself a home depot crawler as well but so far no finished projects 😀
Hahah I know what you mean, my project success rate is definitely less than half 😉 Thanks for reading, Peter!
I’ve thought about making my own rack but since I don’t have much time and my garage is packed with tools and motorcycle, I decided to buy. Found something that would stick out to hang a jacket on a hanger instead of just a little hook. It arrived, I looked at the weld and thought, I give it 5 months. It was 3 and on the floor. Your idea is simple and seems to function well. I can change the length and beef up the mount so I can hang everything I want. Good job.
Thanks JD! Yep, there aren’t any welds here to break lol. My husband and I still use this one three and a half years later!
Just discovered this excellent idea – thanks for the tips/tricks!